Coastal homes face relentless assault from salt spray, mildew, and grime that embed deep into siding surfaces. Before you even think about applying fresh paint, you need to remove these contaminants completely or watch your new finish fail within months. Pressure washing removes dirt and prepares surfaces effectively, creating the clean foundation essential for paint adhesion and longevity. This guide walks you through the complete process, from safety preparations to final surface verification, ensuring your exterior is truly ready for a lasting finish.
Table of Contents
- Key takeaways
- Essential preparation for pressure washing your house
- Step by step how to pressure wash your house properly
- Common mistakes to avoid and troubleshooting tips
- Verifying results and prepping for painting after washing
- Expert painting services for coastal homes
- Frequently asked questions
Key Takeaways
| Point | Details |
|---|---|
| Essential preparation | Inspect for damage, relocate items, protect plants and fixtures to prevent costly issues. |
| Right cleaning solutions | Select cleaners matched to siding type, such as oxygen bleach for vinyl and pH neutral agents for stucco. |
| Bottom to top cleaning | Follow a bottom to top cleaning sequence to avoid recontaminating cleaned areas. |
| Paint readiness verification | Ensure the surface is completely dry and free of residue before painting to promote adhesion. |
Essential preparation for pressure washing your house
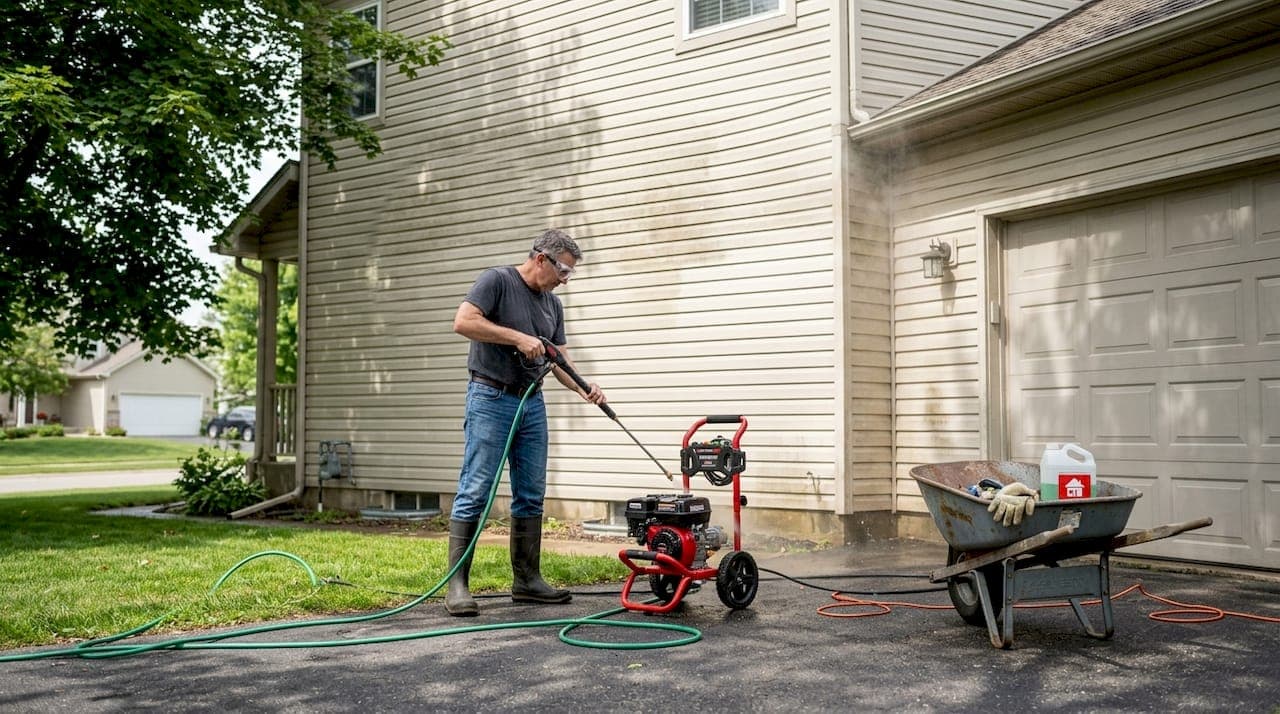
Successful pressure washing starts long before you pull the trigger. Preparation includes inspecting for damage, moving objects, protecting plants, and selecting cleaning solutions that match your specific needs. Walk your property's perimeter and examine every surface you plan to clean. Look for loose siding, cracked caulking, or rotted wood that could allow water penetration. Mark these areas for repair before washing begins.
Move or cover everything within the spray zone. Outdoor furniture, decorative items, and potted plants should be relocated at least 10 feet away. Delicate landscaping near the house requires plastic sheeting secured with stakes. Cover exterior light fixtures, electrical outlets, and air conditioning units with waterproof tape and plastic bags. These simple steps prevent costly damage and eliminate cleanup headaches later.
Choosing the right cleaning solution makes the difference between adequate and exceptional results. Coastal homes accumulate salt deposits that plain water cannot remove effectively. Mildew and algae require specialized treatments to kill spores at the root level. Match your detergent to your siding material:
- Vinyl siding responds well to oxygen bleach solutions that brighten without harsh chemicals
- Stucco and masonry need pH neutral cleaners to avoid etching surfaces
- Wood siding requires gentle, biodegradable formulas that won't strip natural oils
- Fiber cement handles stronger alkaline cleaners for stubborn stains
Weather timing affects both safety and results. Never pressure wash when rain is forecast within 48 hours, as moisture prevents proper drying before painting. Avoid working in direct sunlight, which causes cleaning solutions to dry too quickly and leave streaks. Early morning or late afternoon provides ideal conditions with moderate temperatures and indirect light. Wind above 15 mph makes controlling spray patterns difficult and potentially dangerous.
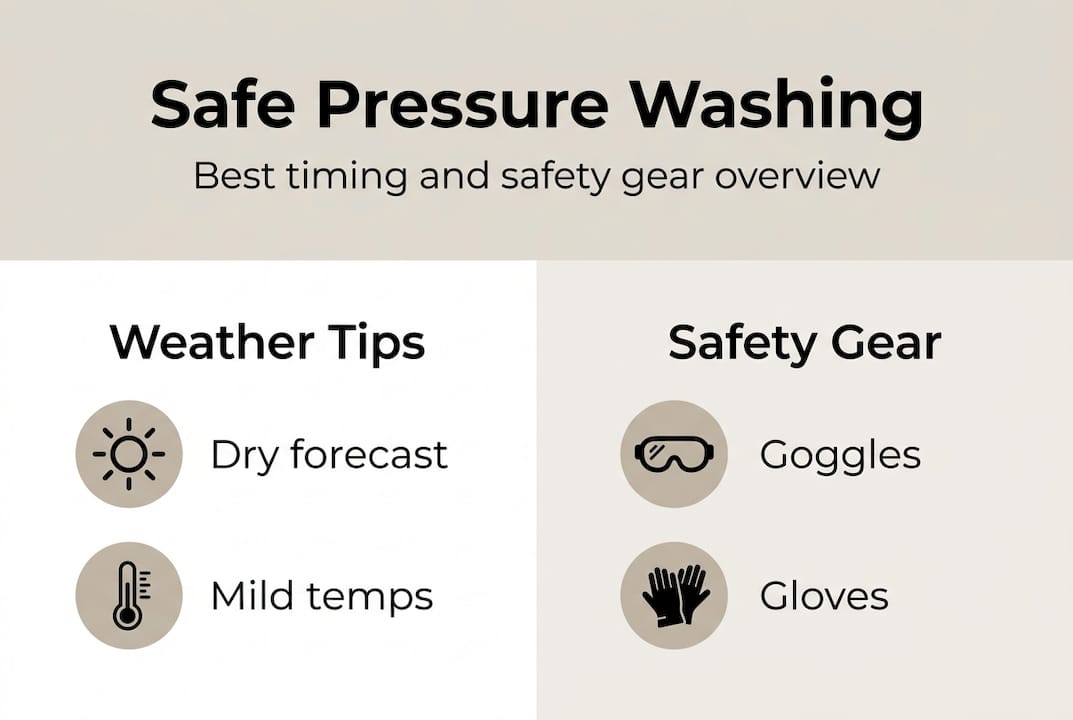
| Safety Equipment | Purpose | Selection Tips |
|---|---|---|
| Safety goggles | Protects eyes from debris and chemicals | Choose wraparound style with side shields |
| Waterproof gloves | Prevents chemical burns and blisters | Select nitrile or neoprene for chemical resistance |
| Non-slip boots | Maintains footing on wet surfaces | Ensure ankle support and deep tread patterns |
| Ear protection | Reduces pressure washer noise exposure | Use foam plugs or over-ear muffs rated 25+ NRR |
Pro Tip: Test your pressure washer on an inconspicuous area first, like behind a bush or on the garage side. This reveals how your specific siding reacts to the pressure and helps you dial in the perfect distance and angle before tackling visible surfaces.
Gather all equipment and supplies before starting. Running to the store mid-project wastes time and risks leaving surfaces partially cleaned. Your prepping house for exterior painting checklist should include the pressure washer, appropriate nozzles, extension wand, cleaning solution, safety gear, tarps, and repair materials for addressing any damage you discover.
Step by step how to pressure wash your house properly
With preparations complete, you're ready to transform your grimy exterior into a pristine canvas. Effective pressure washing uses appropriate PSI settings and cleaning order to achieve professional results without causing damage. Start by setting your machine to the correct pressure for your siding type. Most residential exteriors require 1,500 to 2,500 PSI, but verify your specific material's tolerance.
Begin at ground level and work upward in manageable sections. This counterintuitive approach prevents dirty water from streaking down freshly cleaned areas. Rinse the entire bottom section first with plain water to remove loose dirt and pre-wet the surface. This initial pass also reveals any problem areas needing extra attention.
- Apply cleaning solution using a low pressure setting or dedicated soap nozzle, working in 10 foot wide vertical sections from bottom to top
- Allow detergent to dwell on the surface for the manufacturer's recommended time, typically 5 to 10 minutes, but never let it dry completely
- Switch to your cleaning nozzle (25 or 40 degree tip) and rinse from top to bottom within each section, overlapping strokes by 6 inches
- Maintain consistent distance of 12 to 18 inches between nozzle and siding, adjusting closer for stubborn stains but never closer than 6 inches
- Move the wand in smooth, sweeping motions rather than holding it stationary, which can gouge surfaces or strip paint
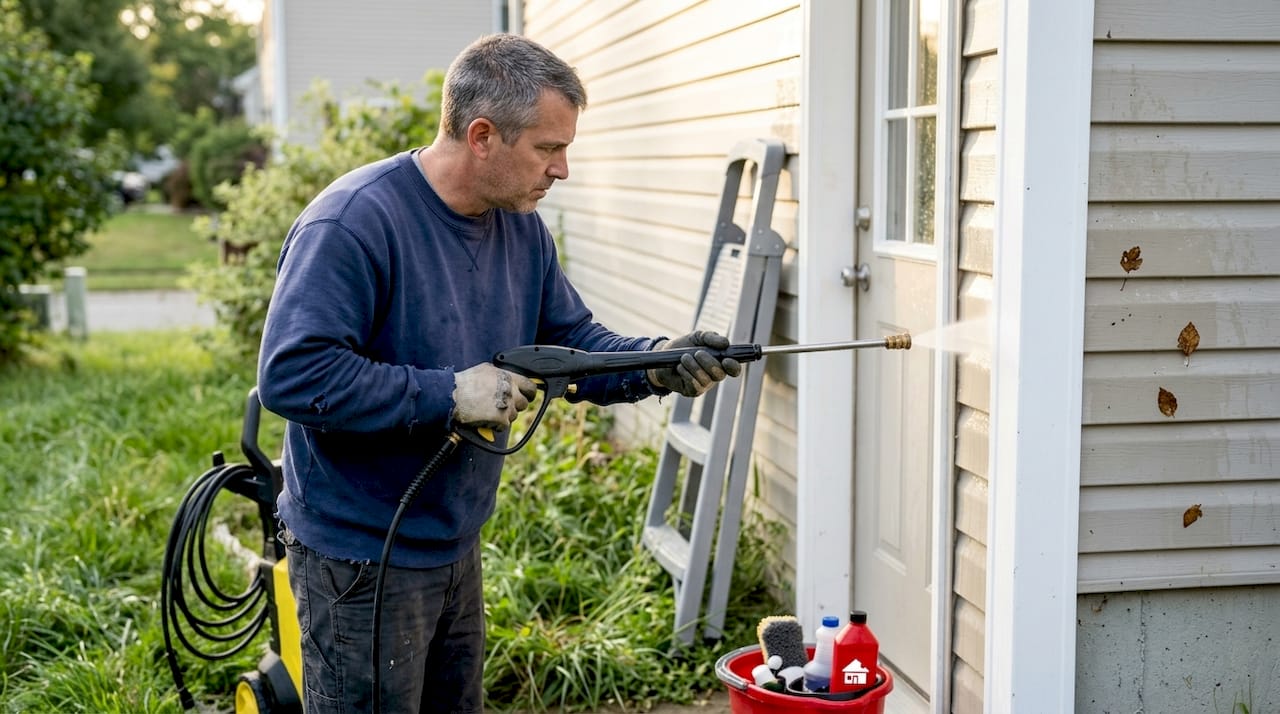
- Work around windows and doors carefully, angling spray downward to prevent water intrusion through seals
- Complete each section fully before moving to the next, ensuring uniform cleaning without demarcation lines
The angle of your spray matters as much as the pressure. Hold the wand at a 45 degree angle to the surface rather than perpendicular. This directs water and debris downward and away from the siding instead of forcing contaminants into seams and cracks. For particularly stubborn areas, make multiple passes with moderate pressure rather than cranking up the PSI, which risks damage.
"Proper pressure washing technique transforms a house exterior by removing years of accumulated grime while preserving the underlying surfaces. The key lies in patience and systematic coverage rather than brute force."
Pro Tip: Keep your pressure washer wand moving constantly in a steady rhythm. Pausing even briefly can create visible clean spots or damage the surface. Think of it like spray painting with smooth, overlapping strokes that blend seamlessly together.
Pay special attention to areas that accumulate the most contamination. Under eaves, around downspouts, and near ground level typically harbor the heaviest buildup. These spots may require a second application of cleaning solution and additional rinse time. Your pressure washing guide emphasizes thorough coverage in these high-risk zones to prevent premature paint failure.
After completing the main surfaces, address trim, fascia, and soffits with reduced pressure. These areas often feature thinner materials or more delicate finishes that damage easily. Switch to a wider angle nozzle and increase your working distance to 18 to 24 inches. Rinse gutters and downspouts to remove debris that could stain your freshly cleaned siding.
Common mistakes to avoid and troubleshooting tips
Even experienced DIYers make errors that compromise results or cause expensive damage. Avoiding too high pressure and staying mindful of surfaces prevents most common problems. The biggest mistake is assuming maximum pressure delivers better cleaning. Higher PSI actually increases damage risk while providing minimal cleaning benefit beyond the optimal range.
Using the wrong nozzle creates problems ranging from ineffective cleaning to surface destruction. Red zero degree nozzles concentrate water into a laser-like stream that cuts through siding, wood, and even concrete. Reserve these exclusively for stripping paint or cleaning concrete driveways, never for house exteriors. Green 25 degree and white 40 degree nozzles provide the best balance of cleaning power and surface safety for most siding materials.
Timing your pressure washing poorly leads to frustration and wasted effort. Working in direct sunlight causes cleaning solutions to evaporate before they can work, leaving streaks and requiring additional passes. Washing before predicted rain wastes time and money as fresh contaminants immediately redeposit on wet surfaces. Temperature extremes also create issues:
- Below 50°F, cleaning solutions lose effectiveness and water may freeze in equipment
- Above 90°F, rapid evaporation prevents proper dwell time and increases streak risk
- High humidity extends drying time beyond the ideal 48 hour window before painting
Neglecting to rinse thoroughly leaves detergent residue that interferes with paint adhesion. Soap film creates a barrier between siding and primer, causing peeling within months. After cleaning each section, make an additional rinse-only pass to ensure complete removal of all cleaning agents. Look for any remaining suds or slippery feel that indicates residual detergent.
Direct spray on vulnerable areas causes immediate problems. Windows can crack from pressure impact or develop leaks when water is forced past seals. Electrical fixtures and outlets risk short circuits and fire hazards when water penetrates housings. Vents and intake grilles allow water into walls and attics, creating hidden moisture damage. Always angle spray away from these features and reduce pressure when working nearby.
"The difference between amateur and professional pressure washing results often comes down to what you don't do. Restraint in pressure settings, careful avoidance of vulnerable areas, and patience with the process yield far better outcomes than aggressive blasting."
Rust stains and mildew require targeted treatment before general washing. Pressure alone won't remove these contaminants effectively. Apply specialized rust removers or mildew treatments according to product instructions, allow proper dwell time, then pressure wash as normal. For persistent issues, consider removing rust before painting with dedicated chemical treatments that address the problem at its source.
Recognize when to adjust your approach mid-project. If you notice paint chipping, wood splintering, or siding flexing under spray, immediately reduce pressure or increase working distance. Surface damage happens quickly but repairs take significant time and money. Better to make multiple gentle passes than one destructive blast.
Verifying results and prepping for painting after washing
Cleaning completion is just the beginning of your painting preparation journey. Dryness and cleanliness verification ensure paint adhesion and durability after your pressure washing effort. Walk the entire exterior in bright daylight, examining surfaces from multiple angles to catch any remaining contamination. Look for streaks, missed spots, or areas where mildew still shows through as dark patches.
Stubborn stains that survived initial washing need targeted retreatment. Mix a fresh batch of cleaning solution and apply it directly to problem areas with a pump sprayer. Let it dwell for the full recommended time, then scrub gently with a soft brush before rinsing again. Some contaminants, particularly rust and certain mildews, may require two or three treatment cycles for complete removal.
Drying time is non-negotiable for paint adhesion success. Even if surfaces look dry to the touch after a few hours, moisture remains trapped in porous materials like wood and stucco. Wait a full 24 to 48 hours in good weather conditions before proceeding to painting. Extend this period if humidity exceeds 70% or temperatures drop below 60°F. Use a moisture meter on wood siding to verify readings below 15% moisture content.
| Surface Type | Minimum Dry Time | Ideal Conditions | Verification Method |
|---|---|---|---|
| Vinyl siding | 24 hours | Low humidity, 65-80°F | Visual inspection, touch test |
| Wood siding | 48 hours | Below 60% humidity | Moisture meter reading below 15% |
| Stucco | 48-72 hours | Warm, dry weather | Touch test, no dark moisture spots |
| Fiber cement | 24-36 hours | Moderate temperatures | Visual inspection, dry to touch |
Address any damage discovered during washing before painting begins. Small cracks in caulking around windows and doors allow moisture intrusion that ruins paint from behind. Scrape out old, damaged caulk and apply fresh beads using exterior-grade silicone or acrylic latex caulk. Smooth with a wet finger for professional-looking seals. Sand any rough spots, splinters, or raised grain on wood surfaces using 80 to 100 grit sandpaper.
Final preparation steps ensure your paint job starts on the right foundation:
- Remove all protective coverings from plants, fixtures, and outlets
- Sweep away any debris, leaves, or dirt that accumulated during drying time
- Wipe down windowsills and door thresholds to remove dust
- Apply primer to any bare wood, new caulk, or repaired areas
- Verify weather forecast shows at least 48 hours of dry conditions
Coastal homes require specific paint considerations beyond standard exterior coatings. Salt air accelerates paint degradation through moisture and chemical exposure. Your coats for exterior paint strategy should include a high-quality primer designed for coastal environments, followed by at least two finish coats of paint formulated with mildew inhibitors and UV protection. This multi-layer approach provides the durability coastal conditions demand.
Schedule your painting to begin immediately after the drying period ends. Delays allow new contamination to settle on freshly cleaned surfaces. Pollen, dust, and airborne pollutants accumulate quickly, especially in coastal areas with salt spray. If you must wait more than a week between washing and painting, plan to rinse surfaces again with plain water and allow another 24 hour dry period.
Document your work with photos of the cleaned, prepared surfaces before painting begins. These images provide valuable reference for future maintenance and help identify any areas that may need additional attention. They also serve as a baseline for evaluating your paint job's longevity and planning your next exterior painting prep cycle in 5 to 7 years.
Expert painting services for coastal homes
While DIY pressure washing delivers satisfying results, professional services bring specialized knowledge that extends your paint job's lifespan significantly. The team at 4 Elements Painting combines expert surface preparation with coastal-specific painting techniques developed through years of experience in Newcastle's challenging marine environment. Their painters in Charlestown understand exactly how salt air, humidity, and temperature fluctuations affect different siding materials and paint systems.

Professional pressure washing services include detailed surface analysis, appropriate cleaning agent selection, and precision application that eliminates guesswork. The comprehensive approach addresses hidden problem areas that DIY efforts often miss, preventing premature paint failure. When combined with their exterior paint coating guide recommendations, you receive a complete solution engineered for maximum durability in coastal conditions.
Frequently asked questions
How can I tell if my house siding can handle pressure washing?
Most modern siding materials including vinyl, fiber cement, and stucco tolerate pressure washing well when proper techniques are used. Wood siding, especially older or weathered boards, requires gentler methods with reduced pressure settings. Check your siding manufacturer's guidelines or consult a professional if you notice loose boards, significant paint peeling, or rotted areas that indicate fragile surfaces.
What pressure washer settings are safe for house exteriors?
Residential exteriors typically require 1,500 to 2,500 PSI depending on siding type and condition. Vinyl and fiber cement handle the higher end of this range, while wood and older surfaces need 1,200 to 1,800 PSI. Always start with lower pressure and increase gradually if needed. Using a 25 or 40 degree nozzle tip provides additional safety margin compared to narrower spray patterns.
Is it necessary to use detergent when pressure washing my house?
Detergents significantly improve cleaning effectiveness by breaking down mold, mildew, and salt deposits that water alone cannot remove. Coastal homes especially benefit from specialized cleaning solutions that target marine environment contaminants. Always choose products designed for your specific siding material and rinse thoroughly to prevent residue that interferes with paint adhesion.
How long should I wait after pressure washing before painting?
Allow at least 24 to 48 hours for complete surface drying before applying primer or paint. Wood siding requires the longer end of this range, while vinyl and fiber cement may be ready sooner in ideal conditions. Use a moisture meter on wood to verify readings below 15% moisture content. Extend drying time if humidity exceeds 70% or temperatures drop below 60°F.